
The kitchen is one of the commonly used areas in the house; hence you should keep it clean. It is home to many appliances and other items.
Dusty refrigerator, smoky oven, cluttered cabinets, and dirty countertops are what you have from the kitchen’s regular use. Cleaning the kitchen may seem to be a tedious task.
Every area in your kitchen has its own cleanup rules that introduce the things you should prepare and also the step-by-step directions. An intense kitchen clean up requires use of this methodical step by step approach.
It is important that you clean the kitchen thoroughly to achieve the best results. This will provide your whole kitchen with a refreshing ambiance.
This article counters the belief keeping your kitchen clean is a tedious or impossible task by providing a step by step guideline on how to clean your kitchen effectively.
There needs to be some organization before commencing the cleaning process to minimize frustrations.
Steps on kitchen cleaning
First, collect all materials and equipment necessary for the cleaning process. These are:
- Materials
- Rugs
- A bucket
- Sponge
- Mild soap/ cleaner or your preferred cleaning agent
- Vacuum cleaner
- Broom
- Dry towel
- Step ladder
- Oven cleaner
-
Clear the sink
The sink should be clear before beginning the cleaning process. Clean all the dirty dishes and clear the trash bin. This creates more room for the intended thorough cleaning of the kitchen area.
It will be tiring to have a glittering clean sink only to recall you still have lots of soiled dishes to do. To prevent any stains or mold:
- Use warm water and a bit of dish soap on a sponge to wash your sink’s basin.
- Ensure that you rinse along the basin’s sides too.
- Don’t forget to clean the basin to get rid of any water stains.
After that, you should clean the difficult to get to faucet crannies and nooks. Dipping a toothbrush in a mixture of warm water and some dish soap will work best. You can use a dry cloth to clean out any left behind water spots.
If the water has a high mineral content, you might see a mineral deposit formation. To remove these deposits, mix white vinegar and water.
Use a clean cloth to apply the mixture, and then gently scrub away the foreign matter. You should rinse this area and allow it to dry.
You might see the sink taking some time to drain. If you experience this, you need to run the garbage disposal to remove anything that may be stuck down there. It’s best to clean the disposal every so often too.
You can use an ice tray to make frozen cubes of vinegar, and then drop them down your disposal.
Next, pour boiling water into it while running the disposal. This can also keep the blades of the disposal sharp and nice.
Ceilings and walls accumulate dirt and grease from the kitchen smoke and other foodstuffs such as spatters from the blender.
For any spills on the walls, wipe them off before they harden, resulting in stubborn stains.
Start the cleaning process with the ceiling and the corner of the walls. It might be challenging to access these areas due to their height.
The step ladder comes in handy as well as the mop with the long handle to reach these heights. Also, remember the doors, doorknobs, and air vents.
Before you start the cleaning, remove all the materials and electrical appliances close to the wall like the refrigerator, to prevent electrocution.
-
Decorative art and photos
For those with wall decorations and framed pictures, you ought to have them off the wall in the first step before starting your cleaning, especially the wall cleaning.
Do not clean the framed art or picture with water directly or a spray cleanser. These liquids may leak through the frame and damage the picture.
Instead, use a wet clean piece of cloth and wipe off all dirt from the frames or art decors.
-
Clean the fan on the ceiling
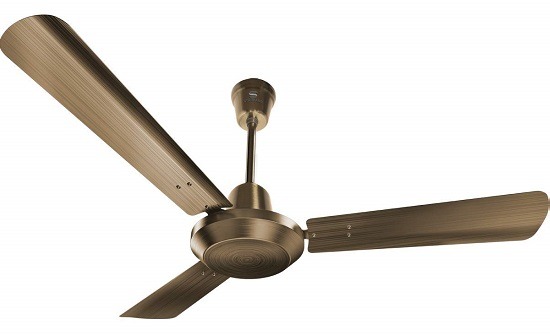
The ceiling fan also requires cleaning because just as the ceiling is a recipient of greasy stains or dirt, so is the fan.
For the parts of the fan that you can dismantle, do so, and clean the parts together with the fan using a mild cleaner. Once done, dry and replace the fan.
-
Wash drapes, curtains, blinds, and windows
Remove the curtains, drapes, and blinds and have them cleaned as per the manufacturers’ instructions.
Clean the window sills, including the corners, using a vacuum. Do the same for both sides of the windows. If your window has grills, scrub off the dirt using a mild abrasive.
-
Clean the refrigerator and oven

Once done with the kitchen structure itself, it is time to turn to the kitchen appliances and equipment.
In this case, begin with the oven and refrigerator. Open the window to allow for the circulation of fresh air in the room due to dust and strong scented chemicals.
Use the oven cleaner for the oven to get magical results. Follow the manufacturer’s instructions on the oven cleaner for cleaning purposes.
Cleaning the refrigerator is another essential part of cleaning the kitchen. The refrigerator may harbor dirt and unfavorable odors if not well cleaned.
Clean beneath the refrigerator as you move it aside to vacuum the coils at the back. Remove all the foodstuffs from the refrigerator for a short while to clean the shelves.
Dispose of any rotten food or drinks. Make the cleaning process fast but perfect to avoid exposure of refrigerated food out on normal temperatures for too long.
The process applies to the freezer as well. Remove the refrigerator shelves and drawers to get rid of any bad odor.
If there is a strong bad odor, leave a baking soda box inside the fridge to absorb the smell.
Wipe the interior of the refrigerator as well as the freezer and refrigerator doors.
-
Clean the stove
Dismantle the stove parts like the burners and knobs to reach the hidden areas. Use your own manual from the manufacturer to determine how to clean the stove.
If you cannot trace your manual, you can find the procedure of cleaning your precise stove model online.
For some stoves, you can lift them to reach the food spills and crumbs. Wipe the entire cooking stove with warm soapy water and a sponge.
For electric stoves, switch off the appliance before the cooking process.
-
Focus on the remaining appliances
It is now time to clean the other kitchen appliances such as the blender, microwave, toaster, etc. Wipe off all the debris from these appliances.
When it comes to the microwave, to eliminate clogged dirt, place a cup of water inside, enabling the fossilized dirt’s loosening.
The other popular cooking appliances inside the kitchen are usually the blender, microwave, dishwasher, and coffee maker.
Here are the tools and items you require to prepare for cleaning them up.
- Old toothbrush
- Sponge
- Paper filter
- Dishwasher
- Tissues
- Clean cloth
- Distilled vinegar (or ammonia)
-
Work on the kitchen cabinets and drawers
Clear the kitchen cabinets from all the materials. Wipe the interior and exterior of the cabinets. Wipe and clean drawers as well.
After cleaning, you can leave your cabinets open for a little while to allow them time to dry and air. Afterwards, you can arrange them back according to your preference.
Remember that one important aspect that can help in keeping your cabinets clean is decluttering your cupboards.
-
Clean the dishwasher
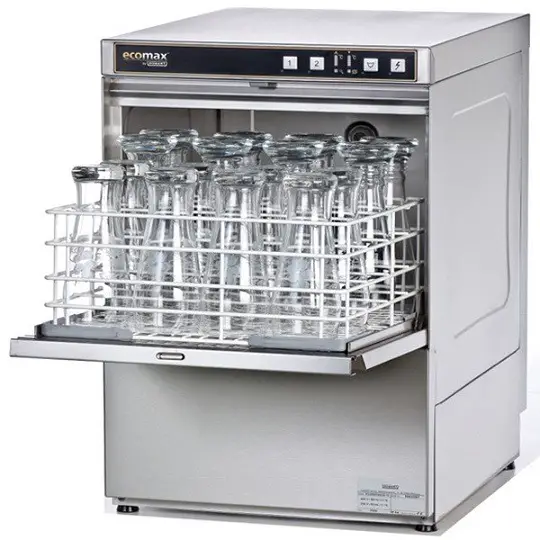
Remove any leftover foodstuffs on the base of the dishwasher. Add some vinegar or baking soda in the dishwasher.
Let the appliance run when empty to clean the remaining dirt and absorb the odors. Wipe the exterior surface of the dishwasher with a cleaning rug.
-
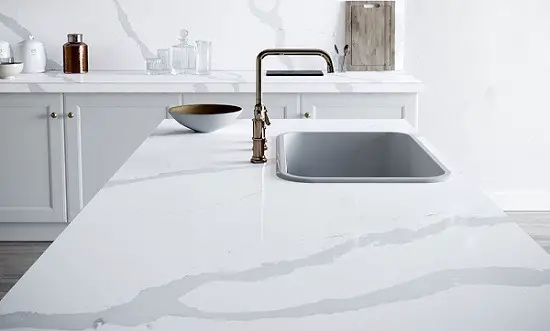
Turn to the countertops
The sink and countertops follow after completion of all the process of cleaning appliances and walls, apart from the floor.
At this point, you can wash the backsplashes and pour baking soda mixed with water and lemon peels in the disposal to give your sink a fresh smell.
Furthermore, you can add ice cubes to the disposal and let it run to sharpen the blades.
-
Cleaning up the exterior of big appliances
It would help if you wiped down your dishwasher, oven and refrigerator outside.
Cleaning the exterior of this large appliances towards the end of the cleaning routine protects them from dirt from splashes. fridge and oven clean up with a thorough
You can use a stainless-steel cleaner to polish or just finish of by buffing the exterior parts with a soft clean dry cloth.
-
Empty and wipe the trash can
Now might not be the time to wash the garbage can entirely; however, make it as clean as possible inside your kitchen.
You can do this by getting rid of the trash if it is full, vacuum any crumbs in the trash can’s bottom, and use a disinfecting wipe to wipe it inside and out.
You can also repeat this process with the compost and recycling bins.
Cleaning up your kitchen floor

This is the last task on the long clean up list; you have polished, tidied, dusted, and vacuumed, and all that’s remaining is making the kitchen floor shine.
Not all floors require similar treatment, and if you make a mistake, you may be making things worse. From carpet to laminate, here is all you should know to keep the floors sparkling.
Safety is key when cleaning a kitchen floor, so if your floor is slippery, find out ways of cleaning a slippery kitchen floor in order to get rid of the slipperiness.
How to keep your floors clean for longer
A kitchen floor often gets grime, dust, and dirt build up fast. You can prevent this by using doormats at entrances, removing shoes, and request guests to do the same.
Also, grooming pets frequently will help keep the floor clean.
It would be best if you instantly wiped up any spills, particularly on absorbent surfaces such as marble. Take into consideration the surface you’re cleaning up before you cause any damage.
Scrubbing kitchen tile floor
When you’re scrubbing kitchen tile, you need to avoid harsh cleaning products. Acids often will affect your kitchen tile; however, they can ruin the seal that protects the grout.
And if the grout is not sealed, they may damage the grout itself. Powerfully alkaline cleaning agents (such as bleach) can damage the sealant as well.
Before you start, find out if the grout is sealed. You can use this easy test. If it gets dark where you applied the water, you should seal the grout immediately. First, you should clean the grout and then the stain.
Do not scrub the flooring regularly. This needs to only take place a few times annually at most, or you have relaxed a little bit, and the dust has comfortably settled with the aid of spilled food and hair spray.
Before you begin, vacuum or sweep the kitchen floor thoroughly, you will save lots of work by removing the loose dust first.
To scrub a kitchen tile floor, you will require:
- mild detergent, if possible pH neutral
- at least one bucket
- a scrubbing brush
- 2 rags
- warm water
- Something to kneel on
- several old towels
Fill the bucket with warm water, and then add a small amount of detergent. You do not want it foamy when you’re scrubbing.
You should dip a rag in the bucket and squeeze it properly. This will help deal with stains on the baseboard and everything you see while on your knees and hands.
You can mentally divide your room into small squares, merely a few feet across. After that, dip the scrub brush into the foamy water.
Softly scrub in round motions by pulling dust away from the corners instead of pushing into them.
You should rinse the brush regularly to stop dirt from transferring from one spot to another. The scrub brush’s bristles sweep up and trap dust that’s then rinsed away.
Use plain water to wet another rag and wring it to get rid of most of the water. After that, use this for rinsing/wiping the completed square.
You can use also improvise by using old towels to wipe any excess water and continue to the nesting spot.
Make sure that you do not leave out the rinsing phase; soap may leave a sticky film that will attract dirt.
The newly scrubbed floor will appear unclean even quicker due to dirt. Continue moving from one area to another.
Keep in mind that while the kitchen tile will not get damaged by water, your cabinetry and baseboards might not be durable especially with exposure to water.
Work fast along the baseboards to stop water from damaging the cabinetry or wood and wipe any excess water fast.
You should reserve scrubbing only for a deep clean up since scrub brushes can damage the sealant that protects the grout.
Quick ways of cleaning kitchen messes

Below are a few tips you can use when cleaning messes in the kitchen:
- Begin with placing things in their right areas. Place also non-kitchen items lying around in their right places.
- Sweep your kitchen floor properly, starting from the furthest corner and moving towards the door; move the furniture around to clean up the area they often stand.
- It is best to use a disinfectant spray in cabinets, sinks, counters, etc. This guarantees a safer environment in the kitchen for you and your loved ones.
- Wash the dishes with hot water; however, not too hot that it may burn you. Set it on your preferred temperature; hot water will kill microbes, so it’s perfect for this chore.
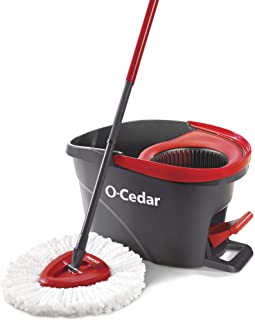
- Mop your kitchen floor to get rid of embedded dirt or stains.
- Dispose of outdated supplies and goods inside fridges, cupboards, and food containers. Be careful when doing this to avoid food poisoning.
- Use different rags to wipe dry all the counters and sinks. This will help prevent the spread of grease and dirt around. Make sure you keep the rags always clean as well. Remember to wash them after you’re done using them.
- Do the clean up when you’re in the mood; achieving this task unwillingly might lead to a substandard result. You can play your preferred song while doing the chore to lighten the ambiance.
These are just easy guides on how to clean up your kitchen. Cleaning up the kitchen frequently, particularly after every use it will help keep your kitchen generally clean and avoid dirt accumulation.
However, it will be great if you also set aside a general clean up day where you can concentrate even on the tiniest details.
Ensuring the kitchen stays free of germs is the most basic way of keeping you and your loved ones healthy.
Safety tips when cleaning your kitchen
There are many kitchen hazards that can cause injuries on a daily basis. The process of cleaning your kitchen increases these risks.
It is important to be conscious of tips on how to improve safety in your kitchen to avoid risks that arise in the cleaning process .
Some basic safety tips on kitchen cleaning include:
- Give a warning of wet floors or liquid spills to prevent falls;
- Do not clean or cook at the same time since the toxins might contaminate food. Also, combining two involving tasks increases the risks of accidents like burns.
- Never use bleach on wooden or dark floors.
- Make sure you keep all cleaning chemicals and supplies away from kids and pets.
- Do not mix products that have bleach with the ones having ammonia. The mixture leads to a very toxic gas that’s hazardous for your health.
Conclusion
One of the major challenges when cleaning the kitchen to understand when and how to start this task and at what point you ought to stop.
Following the guidelines above will result to a perfectly clean and fresh smelling kitchen.
Try out the various methods discussed above to get the best results you’ve been looking for.