
This flooring material is a low-maintenance and tough option. In addition, it’s environmentally friendly because it’s constructed using natural materials like limestone particles, wood and cork dust, and linseed oil.
On the downside, linoleum isn’t as long-lasting as some other surface covering solutions, like vinyl. As a result, you must exercise caution when cleaning this flooring material. Stay away from harsh chemical mixtures, and adhere to preventive measures so as not to damage its surface or sheen.
Advantages of linoleum floors
Linoleum offers a number of advantages in addition to its very long lifespan:
Eco Rating:
The material is non-toxic and contains no volatile organic compounds (VOCs). In addition, it is recyclable, which makes it one of the most environmentally friendly flooring solutions available.
Water Resistance:
While too much moisture causes linoleum to deteriorate, it’s water-resistant in daily situations, unlike laminate or wood floors.
Durability:
Due to its unique manufacturing method, linoleum wears less. Slight scratches are less noticeable, and you can fix them easily by refinishing and buffing.
Comfort:
Linoleum’s natural padding supports your footfalls perfectly, whereas stone or ceramic floors can be rough on your joints, back, and feet.
No products found.
How often should linoleum floors be cleaned?
The frequency with which you should clean a linoleum floor is determined by how heavily you use the floor, as well as a number of other factors such as:
Is it an older floor that scratches easily from grit and dirt, or a newer type with a more durable wear layer? Do you have a lot of spilled drinks and food? Is grime and mud tracked onto your floor on a regular basis?
Cleaning a linoleum floor weekly is a good idea; however, you may have to do it daily or no more than once every month based on the conditions.
The best way to tell is to look at the floor every day. Clean the floor if stains and dirt are visible, even if you cleaned it the previous day.
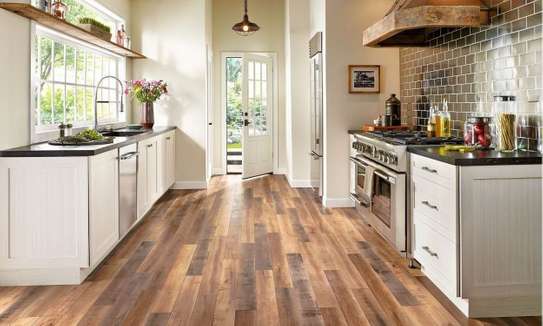
Linoleum Kitchen Floors: How to Keep Them Clean
Cleaning linoleum kitchen floors is as simple as vacuuming and mopping with a dish-soap-vinegar-water mixture. Mopping once a week, dusting once a day, and deep cleaning once or twice a year are all recommended.
Once a week, perform a basic cleaning
You should anticipate undertaking a “basic clean” on the linoleum floor once a week. Vacuum or sweep at least once a week to eliminate filth, particularly in high-traffic parts of your home, and to prevent debris from becoming lodged in the linoleum. You can vacuum, dust mop, use a broom, or a combination of these tools.
When sweeping the floors, pay close attention to the tile lines of this flooring material. Debris and dirt will be less likely to become stuck in the cracks. If you have rugs on top of your linoleum, lift them and sweep beneath them on a regular basis.
Mopping every two weeks
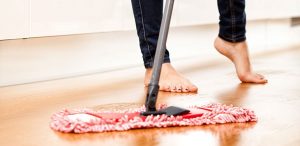
Regular mopping is one of the most important ways to care for linoleum floors, even if you won’t have to do it as regularly as you would with other floor types.
After vacuuming or sweeping the floors, use a damp mop to go over them at least biweekly. To keep these floors even cleaner, some homeowners like to wipe them as often as once a week.
- Wring surplus water out of your mop as you clean, because linoleum collects water, which causes water damage to the floor.
- You may also make your own floor cleaning solution by combining dish soap, a cup of vinegar, and one gallon of hot water in a bucket.
- It’s also essential to use a towel or cloth to dry the floor instantly after mopping to avoid further damage.
- You can use a cleaner formulated for linoleum or lukewarm water to mop these floors for the best results. Other cleaning solutions might not be well-suited for linoleum and leave a sticky residue on the floor that draws grime.
Deep Cleaning: Once a month
Even with frequent maintenance cleanup, you might see an accumulation of stains and dirt now and then. Schedule a deep cleaning session for the linoleum floors once every month.
- Clean the floors, then vacuum or sweep away any excess debris and dirt.
- Scrub difficult stains with a scouring brush and a solution of lemon juice, vinegar, and water to get rid of them without damaging the finish.
- After that, you should sprinkle bicarbonate of soda on the linoleum.
- Lastly, use a linoleum-specific cleaner to mop the floors.
Linoleum Maintenance Tips
A linoleum floor will sparkle if you follow the methods above. There’s no need to go above and beyond what we’ve suggested. There are only a couple of other things to remember in order to ensure the floor stays in good shape:
- Linoleum has an expiration date; therefore, it may be essential to replace it. If there’s water damage or deep-set stains, you will have no alternative but to replace the tiles. This large, complex operation will take time to complete, just like waxing.
- Forget polishing: linoleum floors don’t need shining or polishing. However, if you want to attempt it, follow the same rationale as the cleaning solutions. Only use linoleum-specific polishes on your floors. On the other hand, you can choose items that are clean and shine at the same time.
- Waxing: Strip old wax off your linoleum first before waxing it. It will take a long time to scrub it off with cream of tartar or vinegar. To save time and effort, it is preferable to hire professionals.
- Experts are useful: Do you want a linoleum replacement? If so, hiring experts can save you lots of time and effort. You can try DIY if you’re good with your hands and have some spare time. However, it will be a messy process, and you do not want to risk doing it incorrectly.
- Clean up spills right away: If water seeps into the linoleum, the damage is permanent. To avoid this, avoid allowing water to pool on your floor’s surface. You should make sure that you mop up spills as soon as possible. For larger messes, soak them up with a mop or an absorbent towel.
No products found.
Linoleum versus Vinyl
Vinyl and linoleum are two extremely multipurpose materials that you can use in nearly any room in your house. They are the two flooring materials that are most frequently contrasted.
What is the difference between linoleum and vinyl? Linoleum is a natural flooring material that was invented a long time back whereas vinyl is a synthetic version of it.
Both materials are resilient, but your choice will depend on your personal preference and values e.g. if you are conscious about environmental protection, you are likely to opt for linoleum as it made of natural products.
So, how do the two stack up?
Simple to clean
Vinyl is a breeze to keep clean compared to linoleum. Easy vacuuming, mopping, and sweeping are all that you require from vinyl. Linoleum needs regular waxing and a yearly protective coating. It might also be sensitive to some cleaners, so check whether the cleaning product you want to use is safe for linoleum.
Water-Resistance
Vinyl is much more water-resistant than linoleum. Vinyl is practically impervious to water.
Maintenance
Vinyl and linoleum are both straightforward to keep clean. On any kind of flooring, it is easy to replace single tiles. You can fix any damage easily rather than needing an entire tile replacement.
Damage-resistance
Linoleum is more resistant to wear and tear and lasts longer.
Style choices
When it comes to choices, both kinds of flooring are highly multipurpose. You can get them in a wide range of patterns and styles. Vinyl, on the other hand, is more widespread than linoleum and might come in a wider range of colors.
Lifespan and durability
Linoleum can last between two and four decades, but vinyl is expected to last about one to two decades. Although vinyl might not last as long as linoleum, it’s less expensive to install and replace than linoleum.
Safety
Advances in technology in the vinyl flooring space have come up with vinyl options like step which give lifetime slip resistance performance. For this particular brand, the non-slip properties have been achieved through addition of unique “Step Crystals”.
For sensitive environments like pharmaceutical and healthcare facilities, products like Forbo’s homogeneous conducive vinyl flooring collection with conductive properties in sheet format come in handy.
For kitchen purposes, the non-slip vinyl option is appropriate considering the high risk of slippage in the kitchen.
Installation
It is easier to install vinyl than linoleum, and you can do it at home. Since linoleum is more prone to water damage than vinyl, it’s better to have it put in by a contractor unless installing a water sealant coating is your profession.
Self-Installation
Vinyl is a simple material to work with. Gluing the tiles down or snap them together are the two options.
Installation by a professional
Hire a professional to install the linoleum. By properly applying the needed water sealant coating, a professional will help you avoid future water damage in your house. Water can damage linoleum due to the wrong installation.
Linoleum and vinyl floors in the kitchen

Linoleum or vinyl can both function well in the kitchen, depending on your needs. Although vinyl is more water-resistant, linoleum is more resilient and can endure greater use. Linoleum might be a better choice if your kitchen gets a lot of traffic.
Visually, you can discern the difference between vinyl and linoleum by looking at the pattern on the floor. The design is imprinted on the surface of vinyl floors. Any damage or holes in a vinyl floor will disrupt the pattern, making them more noticeable.
A linoleum floor’s design is carried all the way through the material, so it will be noticeable even if there are holes or other wear and tear.
How to clean a kitchen vinyl floor
The majority of homeowners have vinyl kitchen floors. Vinyl material carries a wide range of benefits. The floor not only offers high longevity but also gives you a comfortable time during cleaning.
It is rare for vinyl flooring to get discolorations. Besides, the floor material significantly boosts your kitchen’s aesthetics. If you have a vinyl kitchen floor, follow the steps below when cleaning.
- The first thing to do would be to get rid of all loose particles on the surface. You can use a vacuum or suitable brush to ensure you sweep all dirt particles. Do not proceed to the next step until the floor is free from all dust. Also, don’t forget to focus on the corners and edges. These areas tend to hide dirt.
- Next, use warm water with a suitable vinyl detergent to wipe the floor. Feel free to use a clean kitchen mop or duster while doing this.
- At times, you are likely to notice suck particles on the vinyl floor. Use a clean microfiber cloth to get rid of these particles. Wipe the vinyl floor gently to remove the stain or stubborn particles.
- After you finish cleaning the vinyl floors using warm water and detergent, allow them to dry. You can leave the kitchen for about 15 to 20 minutes, depending on the percentage of aeration it receives. Alternatively, if you want to use your kitchen right away, dry the floor using a clean, dry cloth.
- When cleaning a kitchen floor, it is always essential to use the most suitable chemicals. So, always consult your manufacturer on the best vinyl floor cleaning agents. Avoid using harsh chemicals that can corrode your vinyl floor.